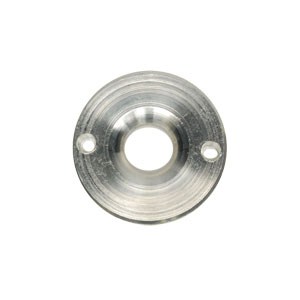
LuggageWorks Aluminum Washer
Replacement top washer for LuggageWorks aluminum and stainless steel handle. The washer is made of aluminum and measures 1 1/2 inches in diameter.
INSTALLATION OF TOP METAL WASHERS
Note: This item is for use on Metal Frame Bags ONLY.
Includes:
- Metal Washer
- 4 screws
Tools needed:
- Phillips screwdriver
- Hammer
- Nail
Instructions:
Step 1 – Remove all 4 screws from washers
Step 2 – Squeeze trigger pins to unlock and release handle
Step 3 – Remove old handle upwardly
Step 4 – With pressure slide foam grip to one side of the coupler until you see a pin (or screw) about half a inch in
Step 5 – With a hammer and a nail tap the pin out of the coupler, then you will be able to separate the rods
Step 6 – Take old washers out of the rods (and bushings if they are not built-in the washer already)
Step 7 – Insert new bushings and washers (our newer bags have the bushing built-in the washer)
Step 8 – Put rods and coupler together, and insert pin back in (NOTE: don’t forget to insert the foam grip before assembling the second rod on the coupler)
Step 9 – Once handle is assembled, proceed to insert just the ends (about 2 inches) of new handle into the pipes of the bag. Trigger pins should lock the rods from sliding all the way down. NOTE: make sure to hold from the top to avoid injury (DO NOT drop handle)
Step 10 – Put all 4 screws in the washers
Step 11 – To slide handle down squeeze trigger pins. NOTE: make sure to hold from the top of the handle to avoid injury (DO NOT drop handle)
NOTE: If handle doesn’t slide down freely, take handle out and manually (with some force) adjust rods aperture angle so they slide completely perpendicular into the pipes of the bag. Then proceed to repeat steps 9 thru 11.
For questions regarding our replacement parts, please contact our Customer Service Department at 800-722-1793, Monday through Friday, between 8:00 a.m. and 5:00 p.m. CT.

